

 |
| Opening and adjusting the image |
In Photoshop, open the file basket.tif. Create a new layer above and, using a dark soft brush, paint the areas near the basket. Set the blending mode to Overlay and the opacity to 50%. Then open the files sky1.tif and sky2.tif and place them in your image. Change the blending mode to Soft Light and the opacity to 50-70%
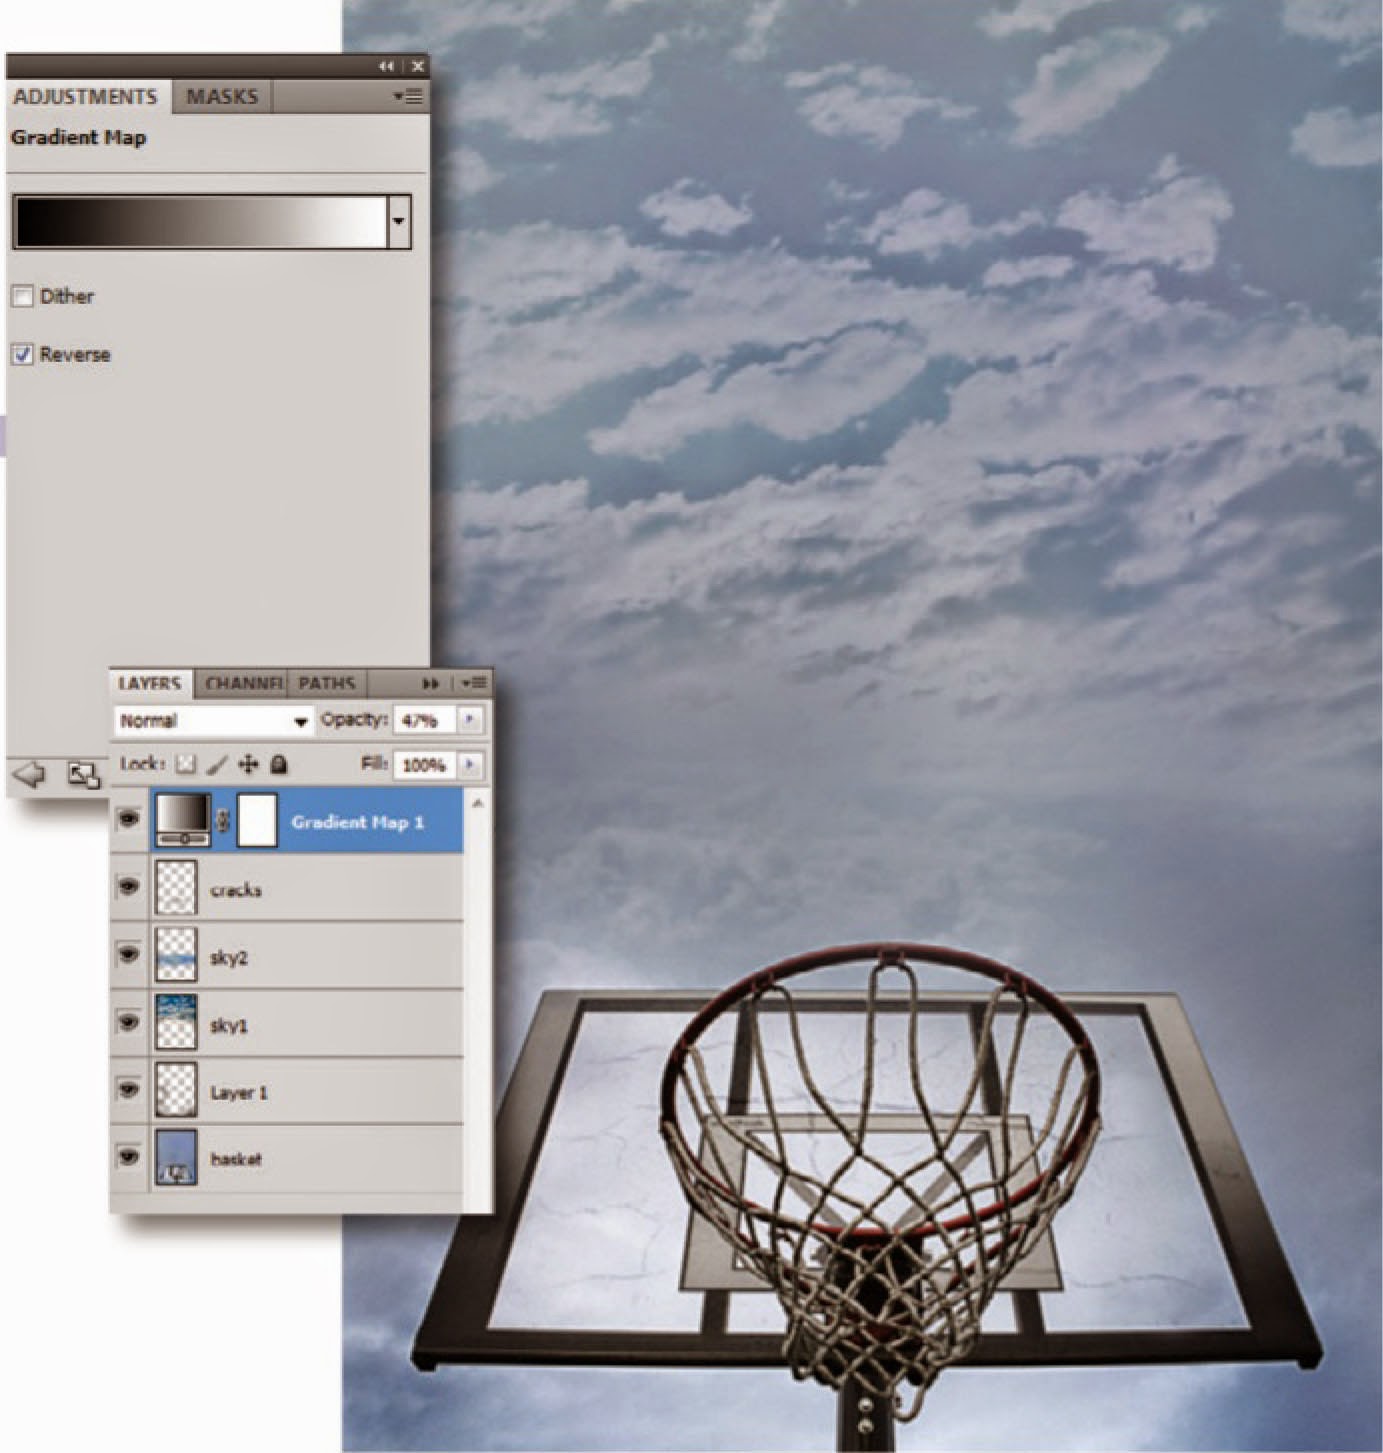 |
| Gradient map |
The main part of this step is adding the gradient map but before that let’s add some cracks to the board. Open the file cracks.jpg. Erase part of the image and use Free Transform > Perspective so that it fits well. Set the layer opacity to 30% and the blending mode to Overlay. Then go to Layer > New Adjustment Layer > Gradient Map and set the opacity to 47%.
 |
| Space and darkness |
Open the files space.png and space2.png. These are going to add a touch of ‘galaxy’ to our image; duplicate, rotate and resize them until you’re happy with the result. Then set the blending mode to Soft Light and lower the opacity. Create a new layer, set the blending mode to Overlay and, with a soft brush, paint in black around the main parts of the image.
 |
| Smoke and wisps |
Open the files wisp.tif, wisp2.tif, smoke1.png and smoke2.png and paste them into the image. Set the blending mode to Screen and balance the opacity so the effect looks as natural as possible. Duplicate thelayers and go to Free Transform > Warp to bend the shapes to fit the image.
 |
| Lights, sparks and more |
Open the file lights-sparks-wisps.tif and paste the lights and sparks effects into the main image. Using the Free Transform Tool then adjust the lights so that they fit the board, rim and the whole scene itself. Duplicate the layers to add more lights and sparks and set the blending mode of all layers to Screen.


Open the files dust.png and dust2.png. Delete the background from the files by going to Select > Colour range and select the dust by clicking the layer thumbnail. Create a new layer and fill it with any colour you like. Now the dust is ready to be placed into the main image.
 |
| Texture |
Place the file texture.tif on top of the others and sthe blending mode to Soft Light. This should add a nice rusty, dirty feel to the image. To adjust the colour, create a new layer (Overlay) and with a so brush paint in some blue stains.
 |
| Main wisp |
Now for that attention-grabbing central wisp. Access the wisps we used previously, place them into the main image and use the Free Transform Tool to duplicate and modify them. Set the blending mode to Screen. For more effects, do the same with the files of lights and sparks, dust and particles, and smokes.
 |
| Final touch |
To make the image even more eye-catching, add an adjustment layer. Go to Layer > New Adjustment Layer > Black and White and input the following settings: Reds: 185, Yellows: 60, Greens: 40, Cyans: 60, Blues: 20 and Magentas: 80.


0 comments: