 |
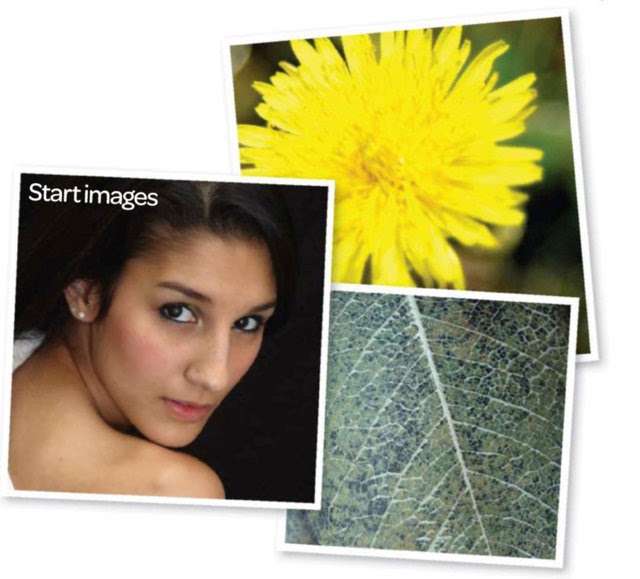
| start images |
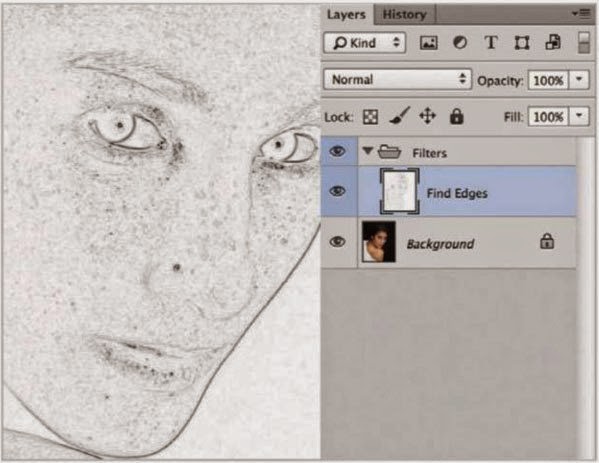 |
| Find Edges |
Open 'Start.psd' from the supplied files. Press Cmd/Ctrl+J to duplicate the layer, then go to Filter>Stylize>Find Edges. To banish the colour, press Cmd/ Ctrl+Shift+U, a shortcut for Desaturate.
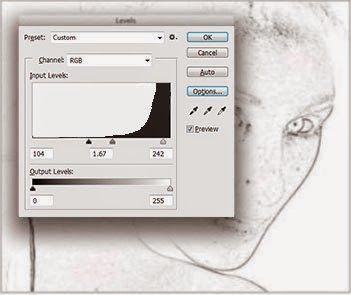 |
| Levels |
Press Cmd/Ctrl+L to bring up Levels. Slide the Shadows slider inward to strengthen the lines, and drag the Highlights slider inward to remove intermediate detail. Click OK when done.
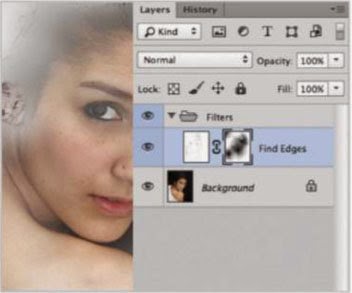 |
| Mask it |
Add a layer mask with the icon in the Layers palette. Set Foreground to black. With a soft, round brush at 80% opacity, paint in the mask in the facial. shoulder; and upper left areas.
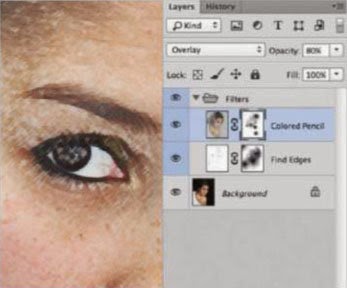 |
| Colored Pencil |
Duplicate the Background layer and move to the top. Go to Filter> Artistic-Colored Pencil. Use these settings: 7. 14,38. Click OK. Set Opacity to 80%. Use a mask to paint out some of the effect.
 |
| Museum wall |
Go to File>Place, add 'Wall.jpg' from the supplied files. Set the blend mode to Multiply. Add a layer mask and paint out some of the texture, especially in the facial area.
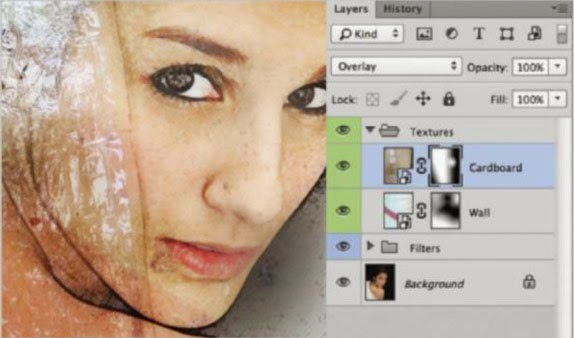 |
| Some old cardboard |
Go to File>Place, add 'Caroboardjpg' from the supplied files. Set the blend mode to Overlay. Add a layer mask and paint out some of the texture in the right side and the bottom left.
 |
| The family sofa |
Now place 'Sofajpg' from the supplied files. Set the blend mode to Color Burn and drop Opacity to 50%. Add a layer mask and paint out some of the texture, especially inthe facial area.
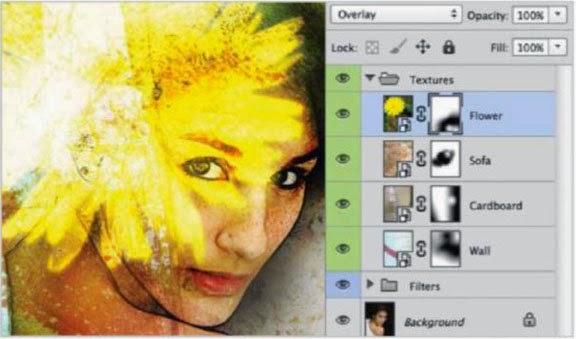 |
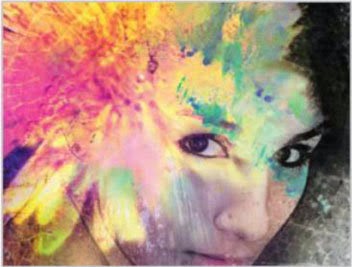
| Add a flower |
Next, place 'Flowerjpg' Set the blend mode to Overlay. Add a layer mask to paint out some of the bottom-right area. We need to boost the flowers presence, so we'll duplicate in the next step.
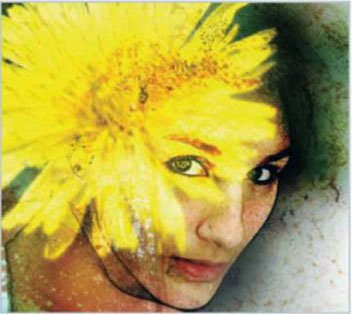 |
| Flower power |
Press Crnd/Ctrl-J to duplicate the flower. Change the blend mode to Multiply. This will darken a lot of the area. Click the mask and paint black in those areas. Keep the flower intact.
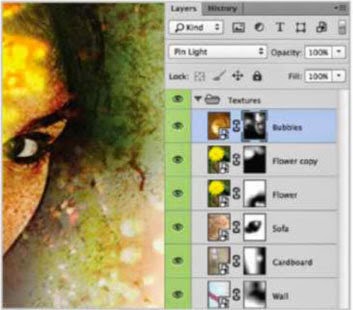 |
| Borrow some bubbles |
Next, place 'Bubblesjpg'. Set the blend mode to Pin Light Opt/ Alt+Click the Layer Mask icon. Set Foreground colour to white, then paint in areas to add a light presence of the bubbles.
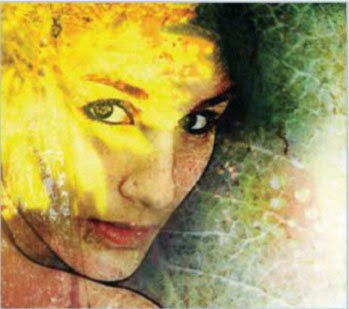 |
| Leaf veins |
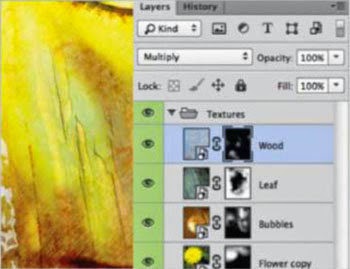
Place 'Leaf.jpg' from the supplied files. Set the blend mode to Overlay. Add a layer mask,set Foreground colour to black, and paint out some of the texture. especially in the facial area and the upper flower area.
 |
| Old wooden plank |
Now place 'Woodjpg' from the supplied files. Set the blend mode to Multiply. Opt/Alt+click the Layer Mask icon. Carefully paint white in select areas such as the cheek and back/shoulder area to add a touch of wood texturing.
 |
| Reinforce the model |
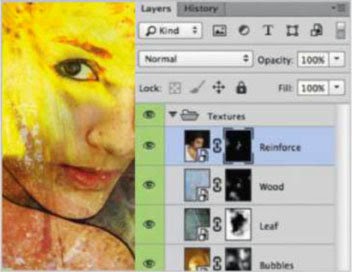
Make a duplicate of the background and move it to the top. Option/ Alt-click the Layer Mask icon. Paint white in a few select areas to reinforce the original model and override the barrage of textures. Be sure to touch the eyes.
 |
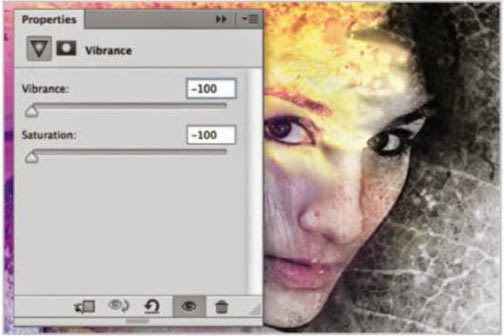
| Vibrance |
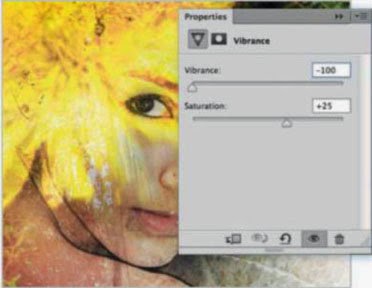
Click the Create New Adjustment Layer button in the Layers palette; choose Vibrance. Drag Vibrance all the way to the left and increase Saturation to +25. Paint black in select areas to restore colour.
 |
| Color Balance |
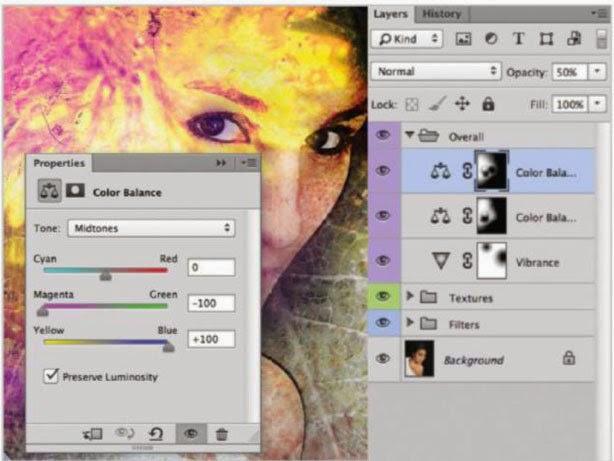
Click the Create New Adjustment Layer button in the Layers palette, choose Color Balance. Set Midtones to (top to bottom) 0, -100, +100. Paint black in the right and select areasto remove the adjustment. Duplicate the adjustment layer and fine-tune the mask until happy.
 |
| Drain surrounding colour |
Click the Create New Adjustment Layer button in the Layers palette, and choose Vibrance. Drag both sliders to the left. Paint black in the upper left area to restore colour.
 |
| Darken with Overlay |
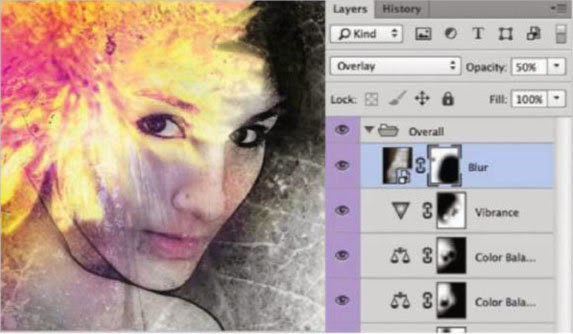
Place 'Blurjpg' from the supplied files. Set the blend mode to Overlay and drop Opacity to 50%. Add a layer mask and paint out some of the texture in the facial area and lower right quadrant.
 |
| Add some watercolour |
Place 'Watercolors_V1_1004jpg'. Situate to the right and confirm the place. Set the blend mode to Darken. Duplicate, move slightly to offset, apply a layer mask, and paint black to lessen areas.
 |
| More watercolour |
Place'Watercolors_V1_1006jpg'. Enlarge slightly before confirming. Set the blend mode to Darken. Apply a layer mask and paint out the bottom and central areas. Duplicate, scale down, set to Darker Color, and paint black in the mask to reduce.
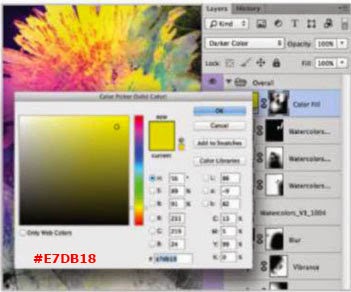 |
| Colour Fill |
Click the Create New Fill Layer button in the Layers palette, choose Solid Color. Pick #e7db18. Change the blend mode to Darker Color. Paint black in select areas to remove colour.
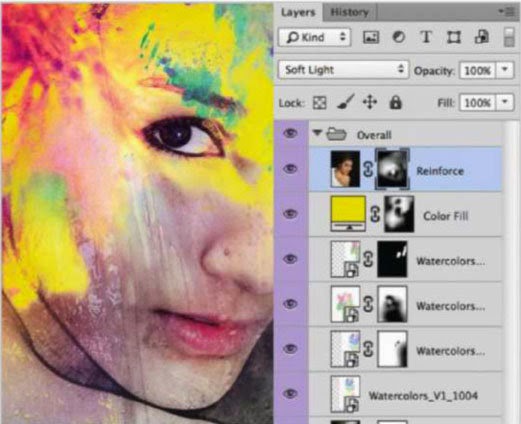 |
| Reinforce the model |
Let's reinforce the model again. Make a duplicate of the background and move it to the top. Set the blend mode to Soft Light. OptionjAlt+click the Layer Mask icon. Paint white in various areas to beef up the woman's presence.
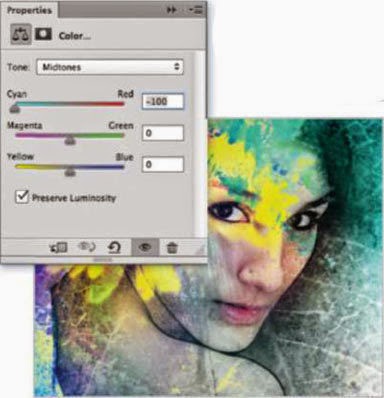 |
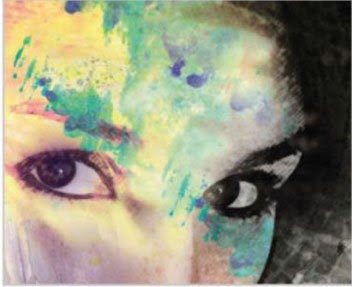
| Cyan love |
Click the Create New Adjustment Layer button, choose Color Balance. Set Midtones Cyan/Red to -100. Paint black in areas to remove the cyan cast. Duplicate the adjustment layer twice and fi ne-tune the masks until satisfied.
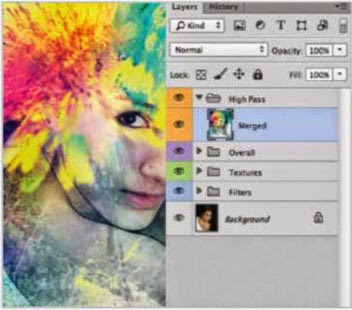 |
| All together now |
Wrth the top-most layer selected, press CmdjCtrl+Option/Alt+Shift+E. This will merge all layers into one and enable us to apply an effect such as a filter to the entire composite.
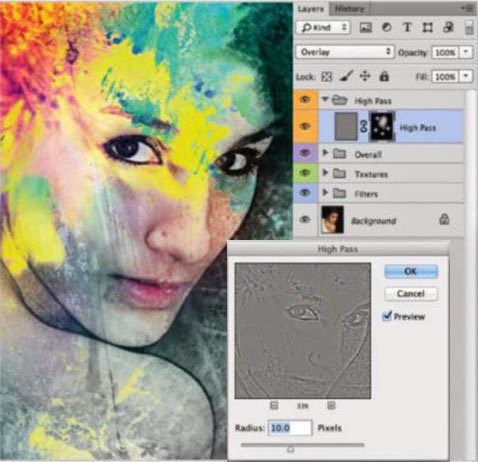 |
| Sharpen with High Pass |
Goto Filter-Otheo+iigh Pass. Set Radius to 10.0 pixels, then click OK. Add a layer mask and paint black at the edges and anywhere else you want to remove sharpening.


0 comments: