Use Dynamic Layer Effects


DOCUMENT SETUP
Create a new document 4000 x 2480px, with a Resolution of 300dpi and a Color Mode of RGB, 8 bits. Name your image and save it. It is also strongly recommended that you have the Snapshot function in your History panel enabled. Now download all the source images from their respective websites


BASIC BACKGROUND
Once all the images have downloaded, you can return back to your Photoshop document. To begin your composition, fill the canvas with black (#050505). Then use a dark grey-blue (#27303b) to draw some background light accordingly. The light source will be located in the upper-right corner. You can adjust this later


EXTRACT YOUR ASTRONAUT
Open the astronaut image, extract it from the background and place it into the scene. You can use layer masks to clean up the edges if need be. Zoom in while masking and use a hard brush. You can then apply another layer mask to the astronaut’s feet to fade them into the background. This helps to create some more depth.


EXTRACT THE ASTEROIDS
Open up the coal images. As in the previous step, extract them from the background and place them into your composition. Use a layer mask and a small hard brush to clean them up if needed. For the extracting, you can use the Magic Wand with a correct tolerance or colour selection (Select>Color Range). Once complete, you should have all the stock images extracted and cleaned up. Adjust the size and position of the elements if necessary.


FINISH YOUR COMPOSITION
Once you have placed the asteroid images, it’s time to add the first adjustment layers on the top of all the layers. First, go to Image>Adjustments> Brightness/Contrast and set the Brightness at +13 and the Contrast at +15. Then add another adjustment layer by going to Image>Adjustments> Photo Filter and apply a Cooling Filter (80) with a Density of 30%. You need to add one new layer to be able to create these layers through the Image menu, or you can use the Adjustment Layers icon at the bottom of the Layers panel.


♦QUICK TIP
Using adjustment layers like Levels and Exposure lets you paint shadows more precisely and non-destructively. You can also change their blending mode to get a different result on the target layer. Remember that you can use a layer mask to paint on certain parts of the image. 


ADJUST THE ASTRONAUT
Now start creating the adjustment layers for the astronaut. Go to Image>Adjustments>Hue/ Saturation and set Hue at 0, Saturation at -100 and Lightness at 0. Create a layer mask for the adjustment layer and use a white brush to bring back the colour in the patches in the arms. Now add another adjustment layer. Select Image> Adjustments> Levels and set them at 32, 0,61, 255. Remember that you need to have the astronaut layer selected to be able to add adjustment layers to it.


HIGHLIGHTS AND SHADOWS
Create two new Levels layers for the astronaut. For the shadows layer, set the middle levels to 0,49. For the highlights layer, set the middle levels to 1,70. Fill the layer mask with black. Start painting the shadows and highlights on the astronaut. Create a selection from the astronaut layer, then create a new layer top of it and fill the selection with white. Fill the layer mask with black, set the blending mode to Overlay and continue painting on the mask to bring up the highlights.


MORE ADJUSTING
Go to Image>Adjustments>Exposure and set Exposure to -3.11, Offset to 0 and Gamma Correction to 0.92. Fill the layer mask with black, and with a white soft brush, start creating the deeper shadows. Add a Cooling Filter (80) at 25% Density and a Brightness/Contrast adjustment, with Brightness set to 12 and the Contrast set to 18. Create a selection from the astronaut layer. Fill the selection with colour #cb844c. Change the blending mode to Overlay and fill the layer mask with black.


ANALYSE YOUR COMPOSITION
With all the adjustment layers for the astronaut done, it is now time to start using the exact same techniques for all of the asteroid layers. See the annotations below to find out how.


ADJUSTING THE ASTEROIDS
Now start stacking up the same adjustment layers for each separate asteroid layer. Use Hue/Saturation with Hue at 217, Saturation at 15, Lightness at 0 and Colorize selected to make sure that each asteroid has the same blue tint. Use Levels to adjust the basic exposure to fit the scene and to paint the shadows and highlights on the asteroids. Go through all the asteroids and add the necessary adjustment layers. Remember that the light source will be placed in the upper-right corner

001
Create your overall composition. Resize and adjust the layers accordingly
002
Use Levels and Brightness/ Contrast adjustment layers to fix the image exposure
003
Paint the deeper shadows and brighter highlights on the Levels and Exposure adjustment layers


"Use Levels to adjust the basic exposure to fit the scene, and to paint the shadows and highlights"


CORRECT SHADOWS AND HIGHLIGHTS
Adjust the highlights and shadows so that they look realistic: harder highlights on the right edge and the darker shadows on the left. Lower the Opacity of the asteroid behind the astronaut to 45% and the one down to the left from him to 20%. Select the asteroid on the lower-right corner and create a selection from it. Fill the selection with the colour #dea363, deselect, then set the blending mode to Overlay and fill the layer mask with black. This layer will be used later.


CREATE SMALLER PIECES
Your astronaut and the asteroids should be finished. Now you can create the smaller asteroids by duplicating an asteroid with all its adjustment layers, flattening it and cutting pieces off it with the Lasso tool. Use the same techniques as before to match the highlights and shadows with the other asteroids. Remember to create the colour fill Overlay layer for the small asteroid right in front of the astronaut. As before, this layer will be used for the light effects later.


ADDING SOME DEPTH
As in the previous step, duplicate an asteroid with its adjustment layers and then flatten it. Go to Filter>Blur>Gaussian Blur to blur two different asteroids together and place them onto the lower-left and right-hand side of the scene. You can then use Levels (Cmd/Ctrl+L) to darken them if they look too bright. If you choose to, you can create even more blurred asteroids and place them onto the edges of the scene. You can also try to place them behind the astronaut.


MAKE THE LIGHT SOURCE
Select a soft brush and a light blue colour. Brush one big stroke from the upper-right corner towards the astronaut and set the blending mode to Screen. Create another layer and click once with the soft brush on it. Change the blending mode to Screen and Opacity to 25%. Place it in the upper-left corner to highlight the light source. Create a layer mask for the larger light stroke and with a soft black brush with Opacity set to 30%, mask away some of the light behind the small asteroid on the light beam.


LIGHT UP THE ASTRONAUT
Make a new layer for each light you create so that you can adjust them if needed. Use a Screen blending mode for the light that comes out of the astronaut and an Overlay blending mode for the light that is reflected on the astronaut. Play with opacity and Gaussian Blur. Create the chest light beam in the same way that you created the main light source in the previous step. Also, use the previously created colour overlay layers to paint the reflected light for the astronaut and the two asteroids.


ADD THE SPACE DUST
Now open up the Cosmos Lighting stock image that you downloaded earlier. Use the Lasso tool to cut pieces from it and change the blending mode to Screen. Create a layer mask for each one and with a soft black brush, mask away the edges so that they seem to blend with the background. Use Hue/Saturation (Cmd/Ctrl+U) to give them the same blue tint. Start placing them onto the edges of the astronaut and the asteroids. Avoid putting them on the far-left side of the scene.


                                               ♦ USING THE ADJUSTMENT LAYERS
Remember to have your adjustment layers clipped onto the target layer. If you have adjustment layers that aren’t clipped to a layer, they will affect every layer under them. With the Ctrl/right-click and Create Clipping Mask option, you can clip adjustment layers to the target layer. It is also good to keep in mind the correct order for the adjustment layers. If you place Levels over your Hue/Saturation, this will affect the colours in your target layer. Adjustment layers are also a great way to change the whole tone of the image when they are placed on top of all layers.


BRUSH IN THE DUST
Use a small hard brush and start clicking on a new layer. Make enough dots so that when you use Free Transform (Cmd/Ctrl+T) and scale them down,they look like dust particles. By duplicating the layer and masking away some parts of random dot layers,create the dust floating around the scene. Use blending modes Screen and Lighten and play with different opacity settings to give it a nice overall flow. As before, avoid putting the dust on the far-left side.


 ♦ QUICK TIP
Always experiment with using different methods. Even if you know what blending mode to use to achieve the look you’re after, browse through them all and see if you can produce some new, usable effects. Even if the result isn’t something you can use with the project you are working at the time, it might be something you can use later in another project.


CREATE THE STARS
As in the previous step, use a small hard brush to paint in the stars. To create the bigger stars, use Filter>Blur>Motion Blur on a single painted star. Then duplicate it and use Free Transform to rotate it 180 degrees or less. You can create as many stars as you wish. To give them even more glow, duplicate the star layer, use Gaussian Blur slightly to blur it and set the blending mode to Screen.


FINAL ADJUSTMENTS
All the elements and effects should now be in place. If your lighting feels off or there is something that looks a little shaky, now is the time to correct it. Clean up any rough edges in your asteroids or astronaut, painting them away on the layer mask. Use a hard brush to get nice clean edges. When you are happy, flatten the image. Bring up Levels and slightly darken the middle tones (0,96) and bring up the whites (245).


SHARPEN THE IMAGE
The last thing to do is to sharpen the image. Duplicate the flattened image and select Filter>Other>High Pass. Set the Radius to 0,5px and click OK. Set the layer’s blending mode to Vivid Light and lower the Opacity to 80%. Flatten the image again and then go to Filter>Sharpen> Smart Sharpen. Set the Amount to 45% and the Radius to 0,5px. Remember – if you resize the image, your sharpening might become obsolete and you may need to sharpen it again.


♦ QUICK TIP
With the High Pass filter, you can sharpen the image in a way that the more blurred parts of the image won’t sharpen. This will bring out only the harder details. Try different techniques to see what works best.


Construct Dynamic Layer Effects

http://psdtopsecret.blogspot.com/


 BEGIN CUTTING OUT
Download image 36860996 from www.dreamstime.com and cut the model’s entire figure out from the background. Using the Pen tool, create a vector shape that you can refer to in the future if anything goes awry. Once your cutout is complete, Cmd/Ctrl-click the vector shape to select and apply a mask on a duplicate (Cmd/Ctrl+J) of the Model (Original) layer.


GET PARTICLE SMOKE BRUSHES
Now that she’s cut out, create a group with that layer selected and name it ‘Face’. This group will act as the main source for the model’s face detail in the image. Before moving on to the next step, you’ll need Particle brushes. Head to www.photoshoptutorials.ws and download the Particle Smoke Photoshop Brushes set.


CUT OUT THE FACE
Once you’ve got the Particle Smoke brushes loaded into Photoshop, it’s time to put them to use. Within the Face group, apply an inverted (black) mask to the model cut-out layer by Opt/Alt-clicking on the Add Layer Mask icon. Select a Particle Smoke brush and click once on the black mask, so that you start painting it white over the model’s face.


QUICK TIP
Use multiple masks on your layers using groups. Group an individual layer – or layers – that already have a mask attached to them that you don’t want to compromise, or that you aren’t sure you want to manipulate, then apply a second mask over that group, enabling you to edit non-destructively.


TRANSFORM UNLINKED MASKS
This step involves a very tedious and monotonous technique that will need to be repeated to carve the flowing shape to frame the face. On your Model (Original) layer, unlink the mask from the layer by clicking the chain link between them. With the mask selected, use Cmd/Ctrl+T to rotate and move the mask to illuminate a part of the model’s face and neck you want visible. Relink when placed. Repeat this step as many times as necessary in the Face group until you’ve revealed as much as you want.


DISPLACED ARM AND HAND
Make another vector cutout of your model’s arm and hand. Create another group below your Face group with a copy of your Model (Original) layer and name it ‘Arm’. Apply a mask of the arm cutout to the layer, so that there’s nothing but the arm on that layer. Repeat step 4, as you did within the Face group, to the layers within the Arm group. Leave the edges fading away, such as the tips of her fingers. Paint her skin colour in the areas that her arm does not reach under your masks.


BLEND THE DISPLACEMENT
Create a new group between your Arm and Face groups and title it ‘Hair Hint’, with another copy of your Model (Original) layer accompanied by an inverted mask. Use a Particle brush and paint in a hint of the model’s hairline close to her face and above her ear, and change the blending mode to Darken. Duplicate that layer and change the blending mode of the duplicate layer to Luminosity. Feel free to repaint the luminosity mask with a differing Particle brush for a more blended effect.


FINGERTIP DISPLACEMENT
Create two new groups and place one above the Arm group and the second below. Title each respectively as ‘Particle Front’ and ‘Particle Behind’. With your brush selected, Opt/Alt-click to quickly select the model’s skin with the eyedropper. In each group, use several Particle Smoke brushes and paint a couple of layers’ worth around the model’s fingertips. Do this within both the Front and Behind Particle groups you just created to emphasise her displacement effect. Aim to have each Particle brush section flowing in the same direction to simulate wind. Always keep in mind that less is more.


COMPRESS WITHOUT COMPROMISE
Once you’re satisfied with the initial displaced model you’ve created, feel free to simplify your layers within each group by compressing them. Depending on the machine you’re working on, you might want to save space by flattening each group with the Cmd/ Ctrl+E function, depending on how may layers you have within them. Alternatively, turn each group into a Smart Object, which enables you to revisit your initial displacement layers for revision. You’ll still want to keep each group separate from each other, as you’ll want to edit layers in between.


STEP BACK AND ADMIRE
It might not feel like it, but a lot has been done. Getting this far is tedious, time-consuming and it’s not always easy, but it’s rewarding to see the results. If you haven’t already, stand up, stretch your arms out, shake them all about and then buckle down, because there’s a lot further to go before the work is complete. Take this time to recap on what has been accomplished so far.

001   Complex cutout
Make use of the Pen tool to cut out a detailed vector of the model’s face, creating the perfect base for the next steps
002   Master masks
Manipulate unlinked masks tethered to the subject for complete creative control over what will be illustrated and shown later on in the final composition
003   Dynamic displacement
Use Particle brushes to enhance the displacement effect, rendering the subject into a beauty that fades into her surroundings


DOWNLOAD THE TEXTURE
In order to keep the stock cost down, try to use only one image for the ink texture. This may be a more difficult and much more intricate process, but it can be done effectively. Go to www.shutterstock.com and download image 89277448. Open it in Photoshop in its own window. Go to Select>Color Range and click somewhere in the white space, then hit OK. Invert your selection (Shift+Cmd/Ctrl+I) and then add a new mask over the top


"Getting this far is tedious, timeconsuming and it’s not always easy, but it’s rewarding to see the results"
 

INTRODUCE THE INK
Now that you’ve got a mask, feel free to use Mask Edge or Refine Edge with your selection still active to adjust the mask’s edge around the ink cloud if it’s not currently to your liking. The main thing is to avoid a white edge around the ink in order for the multiple layers blend to go smoothly. Apply a mask to the Ink layer and name it. Go to Window>Arrange>Tile Vertically and with the Move tool, click and drag the Ink layer over to the main composition.


MAKE MULTIPLE DUPLICATES
Create a new group with the Ink layer selected and place it under your model groups, naming it ‘Ink/
Cloud’. This will be the home of all your ink textures that reside behind the model’s face and arm. Within this new group, duplicate your Ink layer (Cmd/Ctrl+J) and leave the initial Ink layer’s visibility turned off and in a place you may continually draw from so you don’t have to keep going back to the initial cutout. To quickly duplicate, Opt/Alt+click on the layer in the layer window and drag to its destination.


TRANSFORM THE INK LAYERS
In preparation for the next phase, it’s a good idea to create an individual group for each Ink layer duplicate that has been created. As a lot of clipping masks are going to be used, having groups set for each main layer will make for easy organisation. Transform (Cmd/Ctrl+T) a duplicate of the Ink layer that has just been pulled over and scale it up a bit (not so big that you lose resolution). Place the up-scaled Ink layer flowing into or out of the model’s neck. Pay attention to direction and attempt to simulate a flow


EXPERIMENT WITH INK
This is the point in which this tutorial requires you to be experimental with you placement of ink flow and splotches. Repeat step 13 multiple times, varying the Ink layer size and orientation. Keep an eye out for repeating lines and shapes as you will be using the same Ink layer for the whole composition (or feel free to purchase more from ShutterStock). Use masks to blend and combine multiple Ink layers together to create new shapes and paths and to vary the flow of the entire image.


USE CLIPPING MASKS
At this point you should have a decent spread of ink surrounding and emanating from your model, and the image is becoming increasingly colourful and exciting. Now it’s time to pull the whole composition together. Based on where your colour lies in the shape you’ve created, add a new blank layer directly above an Ink layer that needs colour adjusting. Set the blending mode of your blank layer to Color and clip that layer to the Ink layer it rests above by Ctrl/right-clicking>Clipping Mask or Opt/Alt-click the dividing line between the layers in the layer window.

\
ADD COLOUR CASTS
With a soft, round brush selected and your ideal colour chosen, begin brushing at 50% Opacity on the newly created Color layer, now clipped to your Ink layer. The goal is to match or transition colour and tones evenly between each Ink layer around the model. Create a new layer and drag the layer to again rest above the Ink layer you’ll want to transition your tones on. To lighten, set the blending mode to Screen and paint in the same colour used to transition. To darken the tones, set it to Multiply.


WORK ON THE TRANSITION
Now that the colour and ink shape have been set, select your entire Ink/Cloud group, duplicate (Cmd/Ctrl+J), flatten (Cmd/Ctrl+E) and move to above all other layers and invert the mask by pressing Cmd/Ctrl+I. Paint in with a soft brush where you’d like the ink clouds to transition into the model, but keep the transition smooth. Another way to add the ink transition would be to use a duplicate of the Ink layer in place of the flattened Ink/Cloud group, and place it over the model’s face in an area you see fit for great transition.


The last and one of the most important final steps in any composition is to blend everything together with global adjustment layers. Create a group above every other group and title it ‘Adjustments’. This final step will also task you with being experimental and creative. Use combinations of varying adjustment layers toalter colour, contrast and tone value. Take advantage of your masks to control where the adjustments are visible. If you’re not sure what a specific adjustment layer’s effect is, play around – this is one of the beauties of non-destructive editing.


COLOUR GAMUT
While working with drastic colour in any
composition, it’s important to be aware of your
gamut (the accuracy in the range of colours a
colour system can display). Without a properly
calibrated screen it’s easy to fall prey to an
unbalanced image. To test the colour gamut of
your images within Photoshop, simply go to
View>Gamut Warning. If your image is suddenly
covered with grey splotches everywhere, don’t
panic – that’s just a visual representation of the
colours that are out of gamut in your image. To
quick fix this, add and edit with a few adjustment
layers until all of the grey is gone.

Mixced media portraits


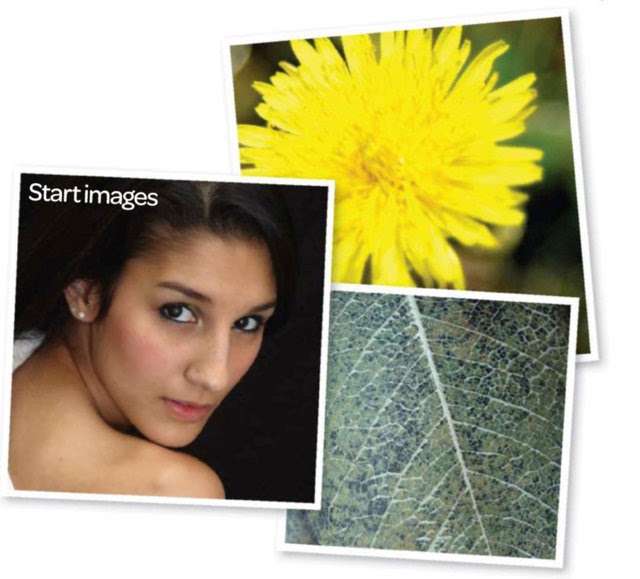
start images

Find Edges
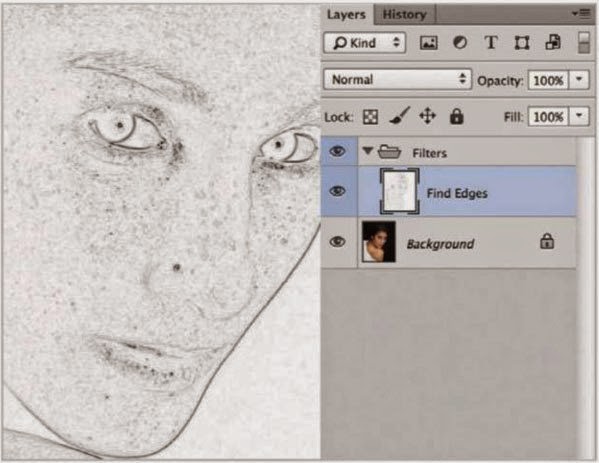
Open 'Start.psd' from the supplied files. Press Cmd/Ctrl+J to duplicate the layer, then go to Filter>Stylize>Find Edges. To banish the colour, press Cmd/ Ctrl+Shift+U, a shortcut for Desaturate.


Levels
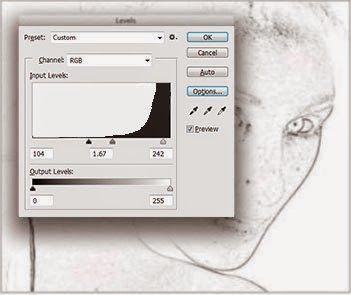
Press Cmd/Ctrl+L to bring up Levels. Slide the Shadows slider inward to strengthen the lines, and drag the Highlights slider inward to remove intermediate detail. Click OK when done.


Mask it
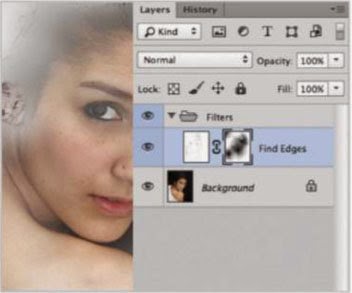
Add a layer mask with the icon in the Layers palette. Set Foreground to black. With a soft, round brush at 80% opacity, paint in the mask in the facial. shoulder; and upper left areas.


Colored Pencil
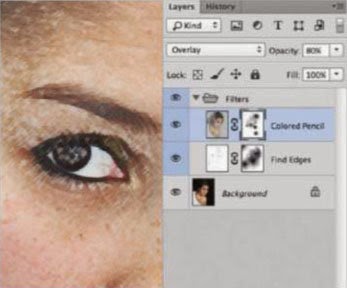
Duplicate the Background layer and move to the top. Go to Filter> Artistic-Colored Pencil. Use these settings: 7. 14,38. Click OK. Set Opacity to 80%. Use a mask to paint out some of the effect.


Museum wall
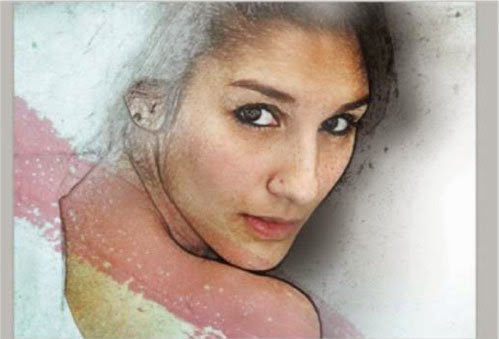
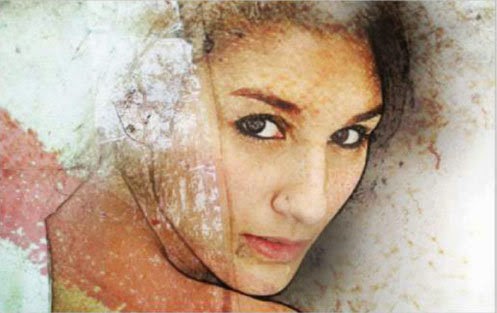
Go to File>Place, add 'Wall.jpg' from the supplied files. Set the blend mode to Multiply. Add a layer mask and paint out some of the texture, especially in the facial area.


Some old cardboard
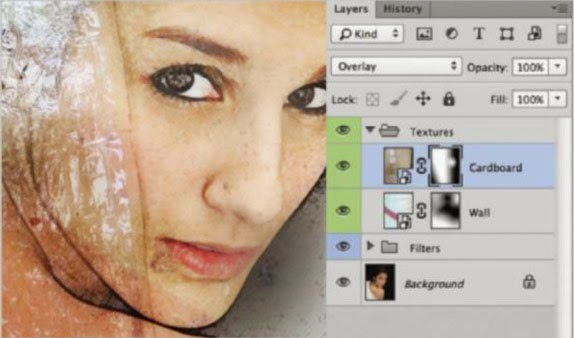
Go to File>Place, add 'Caroboardjpg' from the supplied files. Set the blend mode to Overlay. Add a layer mask and paint out some of the texture in the right side and the bottom left.


The family sofa
Now place 'Sofajpg' from the supplied files. Set the blend mode to Color Burn and drop Opacity to 50%. Add a layer mask and paint out some of the texture, especially inthe facial area.


Add a flower
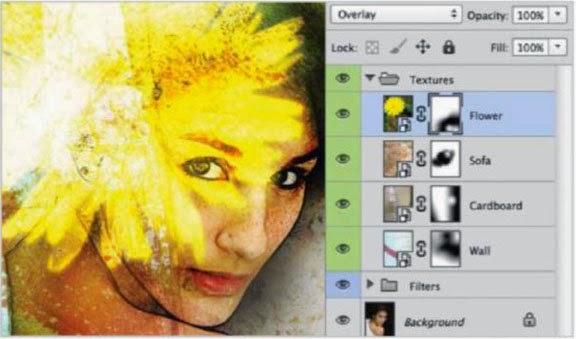
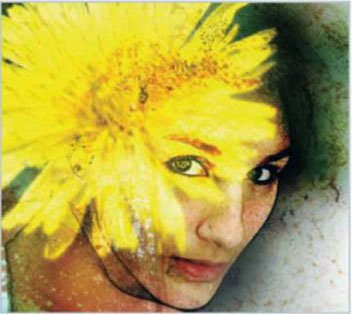
Next, place 'Flowerjpg' Set the blend mode to Overlay. Add a layer mask to paint out some of the bottom-right area. We need to boost the flowers presence, so we'll duplicate in the next step.


Flower power
Press Crnd/Ctrl-J to duplicate the flower. Change the blend mode to Multiply. This will darken a lot of the area. Click the mask and paint black in those areas. Keep the flower intact.


Borrow some bubbles
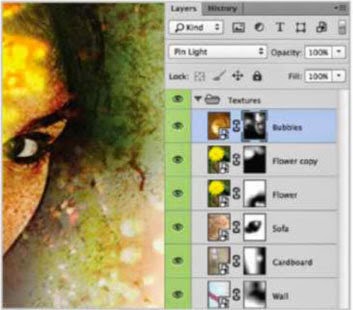
Next, place 'Bubblesjpg'. Set the blend mode to Pin Light Opt/ Alt+Click the Layer Mask icon. Set Foreground colour to white, then paint in areas to add a light presence of the bubbles.


Leaf veins
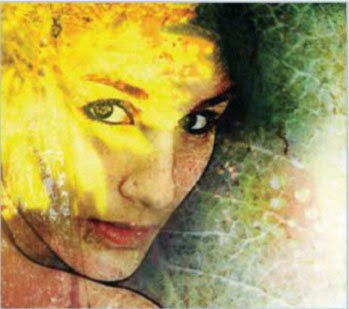
Place 'Leaf.jpg' from the supplied files. Set the blend mode to Overlay. Add a layer mask,set Foreground colour to black, and paint out some of the texture. especially in the facial area and the upper flower area.


Old wooden plank
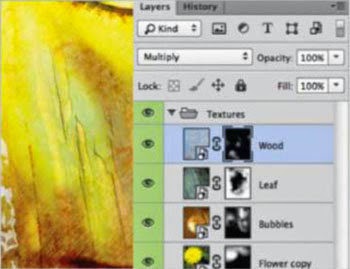
Now place 'Woodjpg' from the supplied files. Set the blend mode to Multiply. Opt/Alt+click the Layer Mask icon. Carefully paint white in select areas such as the cheek and back/shoulder area to add a touch of wood texturing.


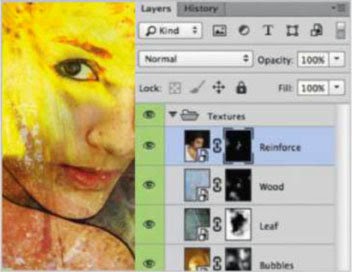
Reinforce the model
Make a duplicate of the background and move it to the top. Option/ Alt-click the Layer Mask icon. Paint white in a few select areas to reinforce the original model and override the barrage of textures. Be sure to touch the eyes.


Vibrance
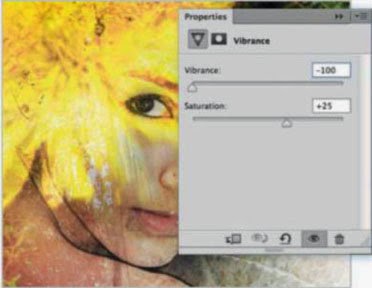
Click the Create New Adjustment Layer button in the Layers palette; choose Vibrance. Drag Vibrance all the way to the left and increase Saturation to +25. Paint black in select areas to restore colour.


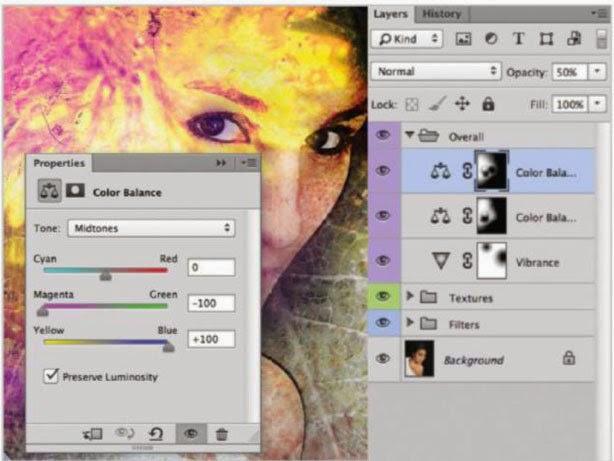
Color Balance
Click the Create New Adjustment Layer button in the Layers palette, choose Color Balance. Set Midtones to (top to bottom) 0, -100, +100. Paint black in the right and select areasto remove the adjustment. Duplicate the adjustment layer and fine-tune the mask until happy.


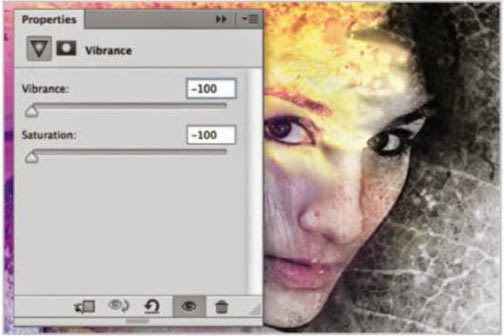
Drain surrounding colour
Click the Create New Adjustment Layer button in the Layers palette, and choose Vibrance. Drag both sliders to the left. Paint black in the upper left area to restore colour.


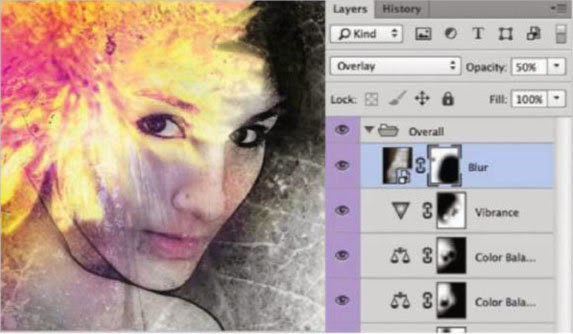
Darken with Overlay
Place 'Blurjpg' from the supplied files. Set the blend mode to Overlay and drop Opacity to 50%. Add a layer mask and paint out some of the texture in the facial area and lower right quadrant.


Add some watercolour
Place 'Watercolors_V1_1004jpg'. Situate to the right and confirm the place. Set the blend mode to Darken. Duplicate, move slightly to offset, apply a layer mask, and paint black to lessen areas.


More watercolour
Place'Watercolors_V1_1006jpg'. Enlarge slightly before confirming. Set the blend mode to Darken. Apply a layer mask and paint out the bottom and central areas. Duplicate, scale down, set to Darker Color, and paint black in the mask to reduce.


Colour Fill
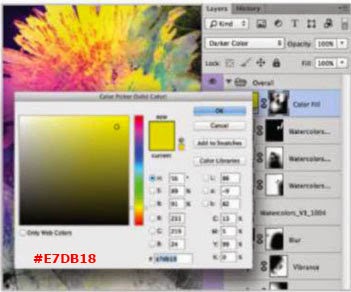
Click the Create New Fill Layer button in the Layers palette, choose Solid Color. Pick #e7db18. Change the blend mode to Darker Color. Paint black in select areas to remove colour.


Reinforce the model
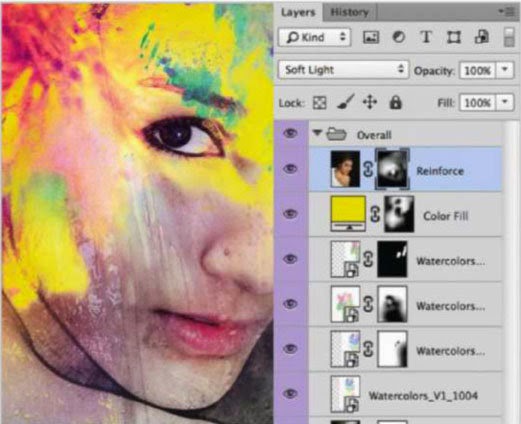
Let's reinforce the model again. Make a duplicate of the background and move it to the top. Set the blend mode to Soft Light. OptionjAlt+click the Layer Mask icon. Paint white in various areas to beef up the woman's presence.


Cyan love
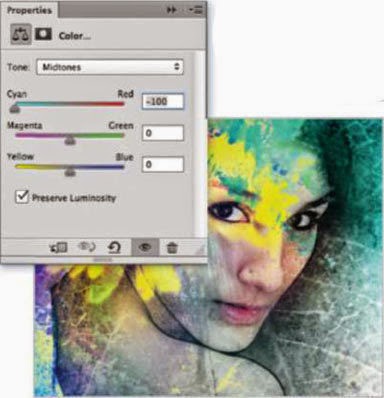
Click the Create New Adjustment Layer button, choose Color Balance. Set   Midtones Cyan/Red to -100. Paint black in areas to remove the cyan cast. Duplicate the adjustment layer twice and fi ne-tune the masks until satisfied.

All together now
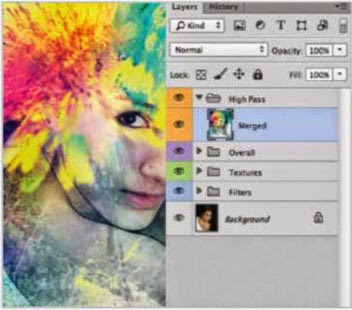
Wrth the top-most layer selected, press CmdjCtrl+Option/Alt+Shift+E. This will merge all layers into one and enable us to apply an effect such as a filter to the entire composite.


Sharpen with High Pass
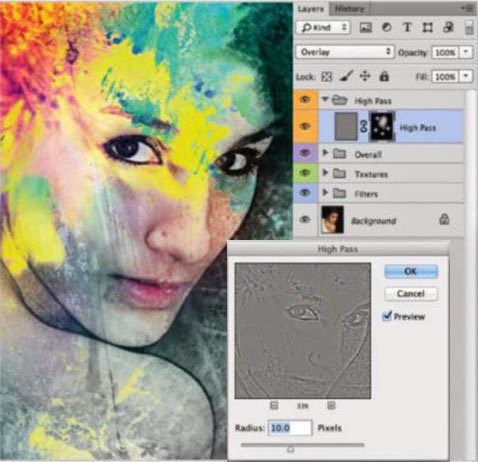
Goto Filter-Otheo+iigh Pass. Set Radius to 10.0 pixels, then click OK. Add a layer mask and paint black at the edges and anywhere else you want to remove sharpening.